Here is the link to the product http://www.jegs.com/p/JEGS-Performance-Products/JEGS-NiCopp-Nickel-Copper-Brake-Lines/2111534/10002/-1, I had wondered if you were using cunifer (NiCopp) lines but the reference to copper was worrisome, particularly if the instructions were to be used by a novice. Each wheel typically has its own segment of rubber hose to deal with the movement of the suspension and wheel.

Block off any wheels that are left on the ground if you are not replacing all the hoses. When you preorder the new Bespoke AI Washer and Dryer, you receive $500 in Samsung credit back. {"smallUrl":"https:\/\/www.wikihow.com\/images\/thumb\/b\/ba\/Change-Brake-Lines-Step-1-Version-6.jpg\/v4-460px-Change-Brake-Lines-Step-1-Version-6.jpg","bigUrl":"\/images\/thumb\/b\/ba\/Change-Brake-Lines-Step-1-Version-6.jpg\/aid691831-v4-728px-Change-Brake-Lines-Step-1-Version-6.jpg","smallWidth":460,"smallHeight":345,"bigWidth":728,"bigHeight":546,"licensing":"

License: Creative Commons<\/a>
\n<\/p>


\n<\/p><\/div>"}, {"smallUrl":"https:\/\/www.wikihow.com\/images\/thumb\/f\/f6\/Change-Brake-Lines-Step-2-Version-6.jpg\/v4-460px-Change-Brake-Lines-Step-2-Version-6.jpg","bigUrl":"\/images\/thumb\/f\/f6\/Change-Brake-Lines-Step-2-Version-6.jpg\/aid691831-v4-728px-Change-Brake-Lines-Step-2-Version-6.jpg","smallWidth":460,"smallHeight":345,"bigWidth":728,"bigHeight":546,"licensing":"

License: Creative Commons<\/a>
\n<\/p>


\n<\/p><\/div>"}, {"smallUrl":"https:\/\/www.wikihow.com\/images\/thumb\/6\/6c\/Change-Brake-Lines-Step-3-Version-6.jpg\/v4-460px-Change-Brake-Lines-Step-3-Version-6.jpg","bigUrl":"\/images\/thumb\/6\/6c\/Change-Brake-Lines-Step-3-Version-6.jpg\/aid691831-v4-728px-Change-Brake-Lines-Step-3-Version-6.jpg","smallWidth":460,"smallHeight":345,"bigWidth":728,"bigHeight":546,"licensing":"

License: Creative Commons<\/a>
\n<\/p>


\n<\/p><\/div>"}, {"smallUrl":"https:\/\/www.wikihow.com\/images\/thumb\/a\/a3\/Change-Brake-Lines-Step-4-Version-6.jpg\/v4-460px-Change-Brake-Lines-Step-4-Version-6.jpg","bigUrl":"\/images\/thumb\/a\/a3\/Change-Brake-Lines-Step-4-Version-6.jpg\/aid691831-v4-728px-Change-Brake-Lines-Step-4-Version-6.jpg","smallWidth":460,"smallHeight":345,"bigWidth":728,"bigHeight":546,"licensing":"

License: Creative Commons<\/a>
\n<\/p>


\n<\/p><\/div>"}, {"smallUrl":"https:\/\/www.wikihow.com\/images\/thumb\/b\/bd\/Change-Brake-Lines-Step-5-Version-6.jpg\/v4-460px-Change-Brake-Lines-Step-5-Version-6.jpg","bigUrl":"\/images\/thumb\/b\/bd\/Change-Brake-Lines-Step-5-Version-6.jpg\/aid691831-v4-728px-Change-Brake-Lines-Step-5-Version-6.jpg","smallWidth":460,"smallHeight":345,"bigWidth":728,"bigHeight":546,"licensing":"

License: Creative Commons<\/a>
\n<\/p>


\n<\/p><\/div>"}, {"smallUrl":"https:\/\/www.wikihow.com\/images\/thumb\/b\/b5\/Change-Brake-Lines-Step-6-Version-6.jpg\/v4-460px-Change-Brake-Lines-Step-6-Version-6.jpg","bigUrl":"\/images\/thumb\/b\/b5\/Change-Brake-Lines-Step-6-Version-6.jpg\/aid691831-v4-728px-Change-Brake-Lines-Step-6-Version-6.jpg","smallWidth":460,"smallHeight":345,"bigWidth":728,"bigHeight":546,"licensing":"

License: Creative Commons<\/a>
\n<\/p>


\n<\/p><\/div>"}, {"smallUrl":"https:\/\/www.wikihow.com\/images\/thumb\/c\/c7\/Change-Brake-Lines-Step-7-Version-5.jpg\/v4-460px-Change-Brake-Lines-Step-7-Version-5.jpg","bigUrl":"\/images\/thumb\/c\/c7\/Change-Brake-Lines-Step-7-Version-5.jpg\/aid691831-v4-728px-Change-Brake-Lines-Step-7-Version-5.jpg","smallWidth":460,"smallHeight":345,"bigWidth":728,"bigHeight":546,"licensing":"

License: Creative Commons<\/a>
\n<\/p>


\n<\/p><\/div>"}, {"smallUrl":"https:\/\/www.wikihow.com\/images\/thumb\/e\/ee\/Change-Brake-Lines-Step-8-Version-5.jpg\/v4-460px-Change-Brake-Lines-Step-8-Version-5.jpg","bigUrl":"\/images\/thumb\/e\/ee\/Change-Brake-Lines-Step-8-Version-5.jpg\/aid691831-v4-728px-Change-Brake-Lines-Step-8-Version-5.jpg","smallWidth":460,"smallHeight":345,"bigWidth":728,"bigHeight":546,"licensing":"

License: Creative Commons<\/a>
\n<\/p>


\n<\/p><\/div>"}, {"smallUrl":"https:\/\/www.wikihow.com\/images\/thumb\/9\/99\/Change-Brake-Lines-Step-9-Version-5.jpg\/v4-460px-Change-Brake-Lines-Step-9-Version-5.jpg","bigUrl":"\/images\/thumb\/9\/99\/Change-Brake-Lines-Step-9-Version-5.jpg\/aid691831-v4-728px-Change-Brake-Lines-Step-9-Version-5.jpg","smallWidth":460,"smallHeight":345,"bigWidth":728,"bigHeight":546,"licensing":"

License: Creative Commons<\/a>
\n<\/p>


\n<\/p><\/div>"}, {"smallUrl":"https:\/\/www.wikihow.com\/images\/thumb\/7\/72\/Change-Brake-Lines-Step-10-Version-5.jpg\/v4-460px-Change-Brake-Lines-Step-10-Version-5.jpg","bigUrl":"\/images\/thumb\/7\/72\/Change-Brake-Lines-Step-10-Version-5.jpg\/aid691831-v4-728px-Change-Brake-Lines-Step-10-Version-5.jpg","smallWidth":460,"smallHeight":345,"bigWidth":728,"bigHeight":546,"licensing":"

License: Creative Commons<\/a>
\n<\/p>


\n<\/p><\/div>"}, {"smallUrl":"https:\/\/www.wikihow.com\/images\/thumb\/1\/1d\/Change-Brake-Lines-Step-11-Version-5.jpg\/v4-460px-Change-Brake-Lines-Step-11-Version-5.jpg","bigUrl":"\/images\/thumb\/1\/1d\/Change-Brake-Lines-Step-11-Version-5.jpg\/aid691831-v4-728px-Change-Brake-Lines-Step-11-Version-5.jpg","smallWidth":460,"smallHeight":345,"bigWidth":728,"bigHeight":546,"licensing":"

License: Creative Commons<\/a>
\n<\/p>


\n<\/p><\/div>"}, {"smallUrl":"https:\/\/www.wikihow.com\/images\/thumb\/5\/54\/Change-Brake-Lines-Step-12-Version-5.jpg\/v4-460px-Change-Brake-Lines-Step-12-Version-5.jpg","bigUrl":"\/images\/thumb\/5\/54\/Change-Brake-Lines-Step-12-Version-5.jpg\/aid691831-v4-728px-Change-Brake-Lines-Step-12-Version-5.jpg","smallWidth":460,"smallHeight":345,"bigWidth":728,"bigHeight":546,"licensing":"

License: Creative Commons<\/a>
\n<\/p>


\n<\/p><\/div>"}, {"smallUrl":"https:\/\/www.wikihow.com\/images\/thumb\/1\/14\/Change-Brake-Lines-Step-13-Version-5.jpg\/v4-460px-Change-Brake-Lines-Step-13-Version-5.jpg","bigUrl":"\/images\/thumb\/1\/14\/Change-Brake-Lines-Step-13-Version-5.jpg\/aid691831-v4-728px-Change-Brake-Lines-Step-13-Version-5.jpg","smallWidth":460,"smallHeight":345,"bigWidth":728,"bigHeight":546,"licensing":"

License: Creative Commons<\/a>
\n<\/p>


\n<\/p><\/div>"}, {"smallUrl":"https:\/\/www.wikihow.com\/images\/thumb\/d\/dd\/Change-Brake-Lines-Step-14-Version-5.jpg\/v4-460px-Change-Brake-Lines-Step-14-Version-5.jpg","bigUrl":"\/images\/thumb\/d\/dd\/Change-Brake-Lines-Step-14-Version-5.jpg\/aid691831-v4-728px-Change-Brake-Lines-Step-14-Version-5.jpg","smallWidth":460,"smallHeight":345,"bigWidth":728,"bigHeight":546,"licensing":"

License: Creative Commons<\/a>
\n<\/p>


\n<\/p><\/div>"}, {"smallUrl":"https:\/\/www.wikihow.com\/images\/thumb\/0\/0b\/Change-Brake-Lines-Step-15-Version-3.jpg\/v4-460px-Change-Brake-Lines-Step-15-Version-3.jpg","bigUrl":"\/images\/thumb\/0\/0b\/Change-Brake-Lines-Step-15-Version-3.jpg\/aid691831-v4-728px-Change-Brake-Lines-Step-15-Version-3.jpg","smallWidth":460,"smallHeight":345,"bigWidth":728,"bigHeight":546,"licensing":"

License: Creative Commons<\/a>
\n<\/p>


\n<\/p><\/div>"}, {"smallUrl":"https:\/\/www.wikihow.com\/images\/thumb\/8\/88\/Change-Brake-Lines-Step-16-Version-3.jpg\/v4-460px-Change-Brake-Lines-Step-16-Version-3.jpg","bigUrl":"\/images\/thumb\/8\/88\/Change-Brake-Lines-Step-16-Version-3.jpg\/aid691831-v4-728px-Change-Brake-Lines-Step-16-Version-3.jpg","smallWidth":460,"smallHeight":345,"bigWidth":728,"bigHeight":546,"licensing":"

License: Creative Commons<\/a>
\n<\/p>


\n<\/p><\/div>"}, {"smallUrl":"https:\/\/www.wikihow.com\/images\/thumb\/6\/6c\/Change-Brake-Lines-Step-17-Version-3.jpg\/v4-460px-Change-Brake-Lines-Step-17-Version-3.jpg","bigUrl":"\/images\/thumb\/6\/6c\/Change-Brake-Lines-Step-17-Version-3.jpg\/aid691831-v4-728px-Change-Brake-Lines-Step-17-Version-3.jpg","smallWidth":460,"smallHeight":345,"bigWidth":728,"bigHeight":546,"licensing":"

License: Creative Commons<\/a>
\n<\/p>


\n<\/p><\/div>"}, {"smallUrl":"https:\/\/www.wikihow.com\/images\/thumb\/3\/33\/Change-Brake-Lines-Step-18-Version-3.jpg\/v4-460px-Change-Brake-Lines-Step-18-Version-3.jpg","bigUrl":"\/images\/thumb\/3\/33\/Change-Brake-Lines-Step-18-Version-3.jpg\/aid691831-v4-728px-Change-Brake-Lines-Step-18-Version-3.jpg","smallWidth":460,"smallHeight":345,"bigWidth":728,"bigHeight":546,"licensing":"

License: Creative Commons<\/a>
\n<\/p>


\n<\/p><\/div>"}, {"smallUrl":"https:\/\/www.wikihow.com\/images\/thumb\/6\/61\/Change-Brake-Lines-Step-19-Version-3.jpg\/v4-460px-Change-Brake-Lines-Step-19-Version-3.jpg","bigUrl":"\/images\/thumb\/6\/61\/Change-Brake-Lines-Step-19-Version-3.jpg\/aid691831-v4-728px-Change-Brake-Lines-Step-19-Version-3.jpg","smallWidth":460,"smallHeight":345,"bigWidth":728,"bigHeight":546,"licensing":"

License: Creative Commons<\/a>
\n<\/p>


\n<\/p><\/div>"}, {"smallUrl":"https:\/\/www.wikihow.com\/images\/thumb\/8\/8d\/Change-Brake-Lines-Step-20-Version-3.jpg\/v4-460px-Change-Brake-Lines-Step-20-Version-3.jpg","bigUrl":"\/images\/thumb\/8\/8d\/Change-Brake-Lines-Step-20-Version-3.jpg\/aid691831-v4-728px-Change-Brake-Lines-Step-20-Version-3.jpg","smallWidth":460,"smallHeight":345,"bigWidth":728,"bigHeight":546,"licensing":"

License: Creative Commons<\/a>
\n<\/p>


\n<\/p><\/div>"}. Replacing the hose typically doesnt require any expensive special tools, so you can save yourself some money by doing the work at home. Vito - Remove the connection from the mounting bracket as well. If there is a leak in any of these pipes or hoses, they need to be replaced immediately. Modern cars use a combination of metal lines and rubber hoses to contain and transfer the fluid that applies your brakes. But if you dont know what size your line is, either measure it with a caliper go online to find the answer in some informative automotive content. Its one thing to provide excellent service, but Anthony goes out of his way to fully explain the work he is doing to make you as the customer feel comfortable. Step 3: Retighten the nut on the top connection. Yes, its amazingly cheap, and even better: its amazingly easy. Let the brake cleaner dry. You do not need to fully remove the bracket, just loosen it enough that it releases the brake line. Step 4: Use hammer to tap in mounting clips. Step 6: Remove the mounting bracket clip. Considering the master cylinder takes a bubble flare which I do not have the tools to produce it, I will be using an adapter than can be purchased from an auto parts stores that thats the double flare and allows you to connect it to a bubble flare female connection. Dot 3, Dot 4, and Dot 5.1 brake fluids are most common in modern vehicles. Please see our, Ford F-150 V8-5.0L - Brake Hose Replacement (Passenger Side Front) - Surprise, Arizona.

Instead, drain the line by cutting the brake hose and use a torch to heat the connection. If it gets any painted part on your vehicle be sure to rinse it thoroughly. You will need to match the existing brake line diameter along with fitting type along with the lines being metric or imperial. Its been a grueling wrenching experience filled with setback after setback, as rust turned the car into a tetanus-filled rust trap nightmare. Jason was a lifesaver. Its always good to have a rag handy to prevent any fluid from dripping. Install the fitting first, the side which is being flared must be on the chamfered side of the clamp. Step 5: Time for test drive. I need to change the rear hard brake line (coming from master cylinder) and 2 rear hard brake lines at the distributor. Reply Very well done, Genaro. If you have some mechanical experience, you can change your vehicles brake lines at home. Hard line to rear passenger side caliper. They differ in wet and dry boiling points. Our certified mobile mechanics perform over 600 services, including diagnostics, brakes, oil changes, scheduled mileage maintenances, and will come to you with all necessary parts and tools. harness mga wiring fuel installation mgtech mgaguru Walter was a pleasure to work with and friendly, polite, professional, and very knowledgeable. Heres how we swapped my iron oxide brake lines for nice, shiny steel ones. You da man!!!! I'm a little bit hesitant to give him a "10" because he's only done one job for me, but I'm gonna give it to him anyway because he was so nice. Fast, free online quotes for your car repair. Youll need a wrench for the bleeder valve, typically 9 mm. Using the old brake line as reference, make some light bends in the brake line by hand. Over time, dust and dirt will eat away at the hoses and eventually they can start leaking. Why? Starting with the passenger side line, note that it should go in behind the rubber drain hose just inside the rear fender. Do you live in a place like Michigan where road salt treats your car like a school of piranhas treats a wounded duckling? A couple light taps should get it back into place. brake lines line tj extended brakelines stainless steel jeep cherokee xj rear wrangler ss 
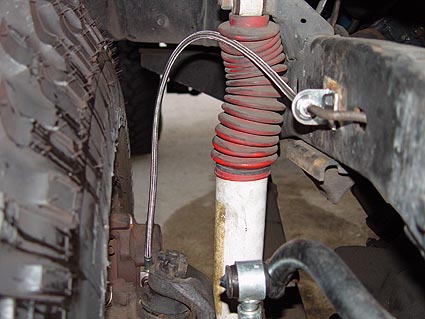
You can now begin installing the new lines. All youre trying to do is make sure the grooves in the vice hold the brake line and prevent it from slipping axially.

Make sure no fluid gets onto the brake rotor, pads, or paint. The lines coming out of the brake master cylinder are made of metal to be strong and long lasting. Ford F-150 V8-5.4L - Brake Hose Replacement (Driver Side Front, Passenger Side Front) - Broken Arrow, Oklahoma. % of people told us that this article helped them. Fitting, then flare. If you are experiencing any difficulties with this job, our certified technicians are always available to assist you. The top connection should come undone with no problem since weve already cracked it open. I need to change my hard brake lines on my 1981 Mercedes 300SD. Can I make them myself? Route the line into its approximate final location and use the brake bending tool for major bends like 90 degree-ers. This article was co-authored by Tom Eisenberg. At my local OReilly Auto Parts store, they charge about a dollar per foot, and we only needed about 13. Note that this line may be routed through a bracket that holds both the hard brake line and the hard fuel line from the fuel tank in place with a rubber buffer. How Actor Brian Muller Became an F1 Podcaster, What Car Should You Buy: Ditching a Tesla for a Gas-Burner, Samsung Bespoke AI Washer and Dryer Preorder, Top Gear America Sneak Peek: Dax Drives a McLaren 765LT. Use your fingers to get it started then a line wrench to tighten it slightly. Step 1: Lift the car onto jack stands. This will greatly help getting the connections loose. Step 1: Screw the new hose into the caliper. I know I will. To drain them loosen the bleed screw and let the fluid drip in to a pan. Have you ever pulled an all-nighter before a big race or off-road event? If the master cylinder runs out of fluid, it will take longer to fully bleed the system of air. For the flare, this is a double flare connection. Thanks. Order one, get $250 credit back. As you proceed through this guide be sure to collect any fluids in a suitable drip pan and also to dispose of old fluids properly. If you dont properly deburr, your flaring tool wont create a smooth sealing surface on the brake line. If the flaring kit doesnt come with a brake cutting tool, just buy one. Then, remove the hoses from your brake calipers or wheel cylinders. Include your email address to get a message when this question is answered. The whole thing was covered in scaly rusty, and as soon as we bent one section, it broke off and leaked everywhere. De-burr the cut line by simply sticking it in the center of the line and rotate back and forth until the burr is gone. Step 7: Repeat for all hoses that need to be replaced. You dont need a sledge, but a little weight can help get these on easier. First day was the $70 diagnostic. Made with in Silicon Valley. Loosen it from the distributor. Tip: Use some penetrating oil if the connection looks dirty and rusty. If you use a normal, open-ended wrench to loosen them, there is a good chance youll round off the connections which will mean much more work. Well, I havent, but it. They mounted near the front and rear of the vehicle and serve to distribute brake fluid from the main line to each of the wheels. Consult your owners manual or with any auto parts store. The most popular service booked by readers of this article is Brake Hose Replacement. Match up the old and new line, place the bender in the correct position and continue to bend the line. Step 5: Crack open the connection going into the brake caliper. Bleeding brakes removes trapped air from the car brake system and flushes old fluid and contaminants. If you do you may bend the metal brake lines and then have to replace them as well. Find the brake line distributor at the rear of the car where the two hard lines split off to each wheel. There are 8 references cited in this article, which can be found at the bottom of the page. You can use a box cutter for deburring, and you can buy fittings for a couple bucks at your local auto parts store. The mount is designed to prevent the hose or connection from twisting and it will hold the connection in place while you loosen it. Just get a nice, tight-fitting, wide wrench that makes lots of contact with the nut. Finally, youll need to drain and replace the fluid and bleed the air from each line. The work hardening is not the problem, it's the way copper tubing is made. Lightly tighten it again so fluid doesnt leak out.

References. I guess the convenience makes up for it. "Clear and detailed. I could probably write that a million times, and youd still forget. What are the specs on them? There are various dies available based on what size line is used which is determined by which fits best within the inside of the line. This will break it loose and you can remove it.

Copper should never be used in brake systems. Then tighten the nearest vice bolt all the way, squeezing the flaring bar halves together. Super smart washingWhen you preorder the new Bespoke AI Washer and Dryer, you receive $500 in Samsung credit back. Keep in mind that you may want to make the bends once the line is installed in the car, as bends in the line can make routing the line a struggle. Making a flare is fairly simple. The lines coming out of the brake master cylinder are made of metal to be strong and long lasting. Tighten the clamp, ensure it is tight as we dont want the line slipping. Once we determined that the old brake lines werent just covered in superficial rust, but that the scaling posed a real safety hazard that could send me flying off a cliff, it was time to wrangle up some hardware. The distribution blocks can be identified by the multiple brake lines running into them. Nice. To reassemble your device, follow these instructions in reverse order. Youll need this because if you try to cut a brake line with a shear, youll just squeeze the end shut. By using this service, some information may be shared with YouTube. Before driving your car you will need to bleed the system to remove the air that has been introduced.

First we will need to ensure the clamp is clean, both the jaws where the line sits and the surfaces that face each other. Once youve flared the line, the fitting isnt going on, so be sure to put on your fitting before you flare. Then try wiggling the tire up and down or side to side to see if you feel any looseness in the wheel bearing and hub.

My old brake line was really, really nasty.

You could flare the line before you install it, but your initial length estimate for the brake line should always be a bit on the long side, as its easier to cut the line down than to splice in a new line. If you buy a $3 flare nut wrench (also called a line wrench) at AutoZone, you can expect to round your nut off. Using the cutter tool, set it in place, remember to cut about a 1/4 longer to account for the flare, then tighten the knob, spin the cutter until its loose, tighten again, spin, and repeat until the end separates. Showed me a bunch of stuff that needed to be taken care of and didn't need to be taken care of. Standard brake line sizes are 3/16-inch, 1/4-inch, 5/16-inch, 3/8-inch, 1/2-inch, 4.75mm, 6mm, 8mm and 10mm. Radiator flush? Brakes are nothing to take a chance with. Unlock expert answers by supporting wikiHow, https://www.youtube.com/watch?v=PvGSMGYhBeQ, https://www.youtube.com/watch?v=nt8qqg3QyX4, http://www.autoanything.com/brakes/how-to-install-brake-lines.aspx, https://www.youtube.com/watch?v=pdb3Oy8bxO0, http://www.carsdirect.com/car-repair/replacing-a-faulty-brake-master-cylinder, https://www.youtube.com/watch?v=uNJE8eRuXpQ, http://www.military.com/off-duty/autos/brake-lines.html, cambiar las lneas de frenado del automvil.

Step 4: Use your line wrench and crack open the top connection. Yes a standard copper line will fail under the pressure of the hydraulic brake system, therefore it cannot be used. Spark plug change??? Step 4: Put the wheel back on. The line should be exposed the same thickness as the large side of the die. ". ", "Very useful information. What Does the Brake System (Hand Brake, Parking Brake) Warning Light Mean? What I DID get was a mechanic who CAME TO ME, fast, and was knowledgable, polite, and trustworthy. Accessibility. A note on flare nut wrenches: do not go cheap on these. Where can I buy/order those hard brake lines? Tip: Loosen the connection while it is still mounted. Most vehicles are equipped with a hydraulic braking system that allows the driver to stop the car by pressing a brake pedal. Well need the wheel out of the way to access the brake hose and fittings. Ensure everything is tight and finally we can move onto bleed the system. Youll need to disconnect your brake hoses from the brake system and remove any brackets or bolts connecting them to the vehicle.

This is a job best left to a pro. Step 2: Bleed the brakes of air. After a minute or two, the wheel should cut through the line and youll be ready to start bending. Choose a size and copy the code below to embed this guide as a small widget on your site / forum. Simply insert the brake line into the appropriate hole in the vice. Genaro was absolutely great. This is located directly up from and behind the rear differential. They should be snug, not as tight as possible. What happens when you go to a shop and leave it for the day or sit in the waiting room??? Repeat with the passenger side line. We use cookies to make wikiHow great. Bending is fairly straightforward, as youre essentially just wrapping a tube around a smooth filleted corner. In the end, you could probably manage to replace your entire brake line for about $20. Allowing for those that say it will then OK I'll replace them in another 50 years with new copper ones . Now to be honest, I don't think you really save very much with this service, which you should because this service doesn't have the rent overhead of a standalone shop. Using a line wrench is recommended, as they are able to grab onto a larger area of the hex which prevents it from stripping. wikiHow is where trusted research and expert knowledge come together. In case of fluid spills rinse the area immediately with cool water. If so, your brake lines might be rusty, so you should replace them to avoid things like death, despair and turmoil. After youve cut your line, youre likely to have little metal burrs on the inside of the brake line, so take a sharp edge and clean those out. Youll notice is either an oily residue on the ground or somewhere underneath the vehicle, with close relation to the brake lines, besides the reservoir level dropping. Inspect the hoses on a regular basis to keep your car safe to drive.