Basically, a 25V Voltage Sensor, like the one used here, has 5 pins in total. AAIMIv2 runs from two 12V batteries; one for the computer and micro-controllers, and one for the drive motors. With Bas on Tech I All the components are interfaced as per the circuit diagram as explained above. Next we need to build functionality into our existing programs to access the readings. This is the HC-05 Bluetooth module, as you can see I have already connected some jumper wires so that it can be easily interfaced with the Arduino. As long as breakdown voltage is higher than 5v then that acts like an open circuit, correct? Battery Efficiency Monitoring- In this tutorial, you will learn how to monitor the efficiency of a 12v Battery using Arduino, 0 to 25v voltage sensor, HC-05 Bluetooth Module, RTC DS3231 Real Time Clock and an Android cell Phone. All comments are manually moderated, so they may take several hours to appear.
I get this error when I tried to run the script "TypeError: My name is Shahzada Fahad and I am an Electrical Engineer. To limit the current running to the analog pin, 2. You will need to calculate your resistor values to bring your maximum battery voltage to 5V. My name is Bas van Dijk, entrepreneur, software developer and maker. I am building a calculator into the site to help you create voltage-dividers, but for now you can find one here.
Solar projects seem like an obvious example. Then using the Android Cell Phone the stored information can be requested wirelessly by sending a command to the Arduino. Descriptions: Size: 19.5 * 20.3mm This module can be used to test the current and voltage. You simply enter an input voltage (your battery) and a value in Ohms for R1, then enter an output voltage (5V). Over time AAIMI can analyze power-use data and fluidly predict whether it has enough battery-life to perform specific tasks. The issue is most batteries are above 5 Volts, and the Pilot RC needs at least 6 Volts at the battery terminals to run.
To poll the sensor every second for one minute, enter "c". Site design / logo 2022 Stack Exchange Inc; user contributions licensed under CC BY-SA. The Bluetooth module communicates with the Arduino through serial communication, as you know in Arduino we have only one serial port available on pin0 and pin1. My favorite solution for such an application is to use an optoisolation module. To convert the analog value to a voltage we use the follow line of code.
 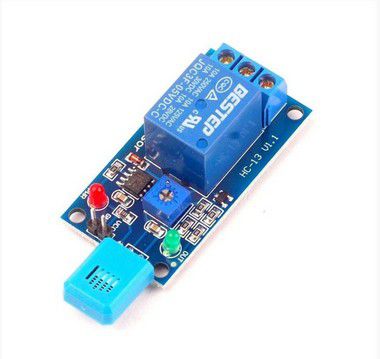 rev2022.7.29.42699. Note: You should start with a resistor of at least 825 Ohms for R1. The following image shows the pins of a Voltage Sensor Module.
  Years ago, I bought my first Arduino with one goal: show text on an LCD as soon as The following image shows the schematic of the Voltage Sensor Module with an input voltage limit of 25V. Very interesting & neat project. The Arduino Uno I have laying here actually regulates an external 12 VDC to 4.80 VDC so my Vref is now 4.80 VDC and not 5.0 VDC, consider that in your code. Please try again later. I also intend to eventually use a barrel jack connector so you can use a 12v wall wart to power the circuit in addition to using the battery. How gamebreaking is this magic item that can reduce casting times? This allows you to use the analogue input of a microcontroller to monitor voltages much higher than it capable of sensing. For instance, do you need to monitor two batteries? Test the circuit on a breadboard before you connect the device to your Arduino, because anything more than 5V will fry it. Make sure the batteries are fully charged to read the maximum levels. To poll the second sensor every second for one minute, enter "d". If we tried to run the battery directly to the Arduinos analog pin we would break it immediately.
Connect and share knowledge within a single location that is structured and easy to search. Warning:If you are using the same Voltage Sensor Module, then make sure that its input voltage (voltage to be measured) is restricted to 25V. TQ so much. But can you explain it to me more detail sir. This depends on the Vref being 5.0 volts. There was an error retrieving your Wish Lists. As you can see on one side we have a block terminal, this is where we connect the voltage and ground wires coming from a battery. This is the complete circuit diagram of the 12v Battery Efficiency monitoring system.
Making statements based on opinion; back them up with references or personal experience. // for example to set January 27 2017 at 12:56 you would call: // rtc.adjust(DateTime(2019, 7, 19, 14, 46, 0)); Click to share on Twitter (Opens in new window), Click to share on Facebook (Opens in new window), Click to share on WhatsApp (Opens in new window), Click to share on Telegram (Opens in new window), Click to share on Tumblr (Opens in new window), Click to share on LinkedIn (Opens in new window), Click to share on Reddit (Opens in new window), Click to share on Pinterest (Opens in new window), Click to share on Pocket (Opens in new window), Click to share on Skype (Opens in new window). You should soon see "Serial Connected" printed to the screen. Back in post #9. Is it possible to make an MCU hang by messing with its power? For the best understanding watch, this tutorial and then you can resume from here. I would appreciate your support in this way!
This device uses voltage-dividers to reduce voltage to a safe level for the Arduino. Are you implying i have to connect the 12V sensor to arduino port 3 normally, with the optoisolator is connected to the arduino input port?
In this tutorial I'll teach you the way a voltage divider works and how to read a voltage sensor with a range of 0-25V. By "bit count" are you referring to the 0 to 1024 values? Date First Available Can i charge a battery and simultaneously measure the battery level via the application of voltage? If the readings do not match, you can adjust the following section of code to calibrate the system. We dont share your credit card details with third-party sellers, and we dont sell your information to others. Do you intend to have the Arduino do any besides light the LED? Assuming the input pin sees a voltage in the range of 0 to 5 volts, this diode will always be reverse bias, and always an open circuit? You can either use the voltage or bit count Maybe "deep cycle" or "marine battery" comes to mind???
A simple but very useful module which uses a potential divider to reduce any inputvoltageby a factor of 5.
The VCC pin is connected with the Arduinos 5 volts. We now have a working battery monitor, but that's only half the mission. Then load upthe following sketchonto your Arduino. A more compelling benefit will be the long-term data this device generates. In this case, the signal can have a voltage of 12 V and the output of the optoisolation module can be connected to the input of the Arduino, where the input is configured as INPUT_PULLUP. The cables from the center of the voltage-dividers connect to the first two analogue-to-digital pins on the Arduino, A0 and A1. It will print the voltage each time it polls, giving you a list of readings to check stability. I'm shaky on the math if my thoughts & numbers were right, is my 0.53mA calc correct for R1 when input is 21v?
Instead, our system considers things like how recent a review is and if the reviewer bought the item on Amazon. Full content visible, double tap to read brief content. The TXD pin of the module is connected with pin2 of the Arduino and RXD pin of the Bluetooth module is connected with pin3 of the Arduino. Specifications: Test Voltage range: DC3 - 25V Test Current range: DC 0 - 3A Package Included: 1 x MAX471 Voltage Current Sensor Module. As an example, if the first sensor on the Arduino is reading 11.8V and the multimeter reads 12V, try adjusting the value on line 21 to 12.25.
You can either copy and paste the following code into your Arduino IDE or download the full setup folder from here. I will explain this in programming how to make a serial port. Website designed and created by Anth's Computer Cave. As you can see on the left side, the voltage sensor Vcc is connected with the Battery 12v input and the ground of the voltage sensor is connected with ground of battery. On line 21 either increase or decrease the value (12.00) slightly to suit your readings. More sensors can be connected with the Arduino. So just as an example the typical code to measure a voltage would look like this: There will be no current through the Zener under normal conditions.
It has a total of six male headers clearly labeled with. You must tailor the resistors in the device to your maximum-intended monitoring voltage.
Shipping cost, delivery date, and order total (including tax) shown at checkout. These multiple codes did not work for me. The RTC DS3231is a low-cost, highly accurate Real Time Clock, which can maintain hours, minutes, and seconds. Since the Voltage Sensor module is basically a voltage divider circuit, you can calculate input voltage using the formula. For the best understanding read article on the RTC DS3231 given in the related projects section. Or just copy online anywhere. There was a problem adding this item to Cart. I've read power adapters can output more than their rated voltage, some quite high. Does a pulldown resistor use less battery power than a pullup resistor? So in my example if my Vref is 4.80 volts the 5.0 in the above code would be changed to read 4.80. If you need the Source code, send me an email on. I suppose it may come down to you get what you pay for. 468). How can I get an AnyDice conditional to convert a sequence to a boolean?
0-25v Voltage Sensor used in Battery Efficiency Monitoring System: Battery Efficiency Monitoring Circuit Diagram: 12v Battery Efficiency Monitoring Arduino Programming: arduino based battery efficiency monitoring, battery efficiency monitoring using cell phone, battery voltage monitoring using cell phone, how to store sensor values in cell phone app database, how to store the values in cell phone database, Arduino Fingerprint Door Lock, Android biometric, Fingerprint app lock, Introduction to Casing Capping Wiring System, Android app development to control Arduino over Bluetooth using Android Studio, Soil NPK Sensor with Arduino and Android Cell Phone Application for monitoring Soil Nutrient, Arduino esp8266 wifi Home/Office Automation System, IOT based Car Parking System using Arduino and Nodemcu esp8266, How to Create Android App for Arduino Sensor Monitoring over Bluetooth, Arduino Oled i2c Display 128x64 with examples, Wiring, and Libraries issues solved, Electric Motor Tripping Reasons and How to fix them, Star Delta Motors, pH meter Arduino, pH Meter Calibration, DIYMORE pH Sensor Arduino Code, 500W Ebike Brushless Motor Controller wiring explanation, Hoverboard Test, Qualcomm Snapdragon 680 Complete review with benchmarks, Arduino CNC Shield V3.0 and A4988 Hybrid Stepper Motor Driver + Joystick, Arduino DC Motor Speed Control with Encoder, Arduino DC Motor Encoder, LM358 IC Pin Configuration, Working, LM358 Circuit Examples, Arduino Libraries Download and Projects they are used in Project codes, Decoder, 3 to 8 Decoder Block Diagram, Truth Table, and Logic Diagram, Max30100 pulse Oximeter Arduino Code, circuit, and Programming, Control Position and Speed of Stepper Motor using Android Bluetooth App, A4988 Driver, & Arduino, MIT APP inventor Arduino Bluetooth Application Making Explained, LinearLayout in android with example codes, Android Fragments and Fragments Lifecycle, Firebase Android Application Designing using Android Studio, ESP32 DHT11, Complete Circuit Diagram of the battery efficiency monitoring system.
I get this error when I tried to run the script "TypeError: My name is Shahzada Fahad and I am an Electrical Engineer. To limit the current running to the analog pin, 2. You will need to calculate your resistor values to bring your maximum battery voltage to 5V. My name is Bas van Dijk, entrepreneur, software developer and maker. I am building a calculator into the site to help you create voltage-dividers, but for now you can find one here.
Solar projects seem like an obvious example. Then using the Android Cell Phone the stored information can be requested wirelessly by sending a command to the Arduino. Descriptions: Size: 19.5 * 20.3mm This module can be used to test the current and voltage. You simply enter an input voltage (your battery) and a value in Ohms for R1, then enter an output voltage (5V). Over time AAIMI can analyze power-use data and fluidly predict whether it has enough battery-life to perform specific tasks. The issue is most batteries are above 5 Volts, and the Pilot RC needs at least 6 Volts at the battery terminals to run.
To poll the sensor every second for one minute, enter "c". Site design / logo 2022 Stack Exchange Inc; user contributions licensed under CC BY-SA. The Bluetooth module communicates with the Arduino through serial communication, as you know in Arduino we have only one serial port available on pin0 and pin1. My favorite solution for such an application is to use an optoisolation module.
To convert the analog value to a voltage we use the follow line of code. rev2022.7.29.42699. Note: You should start with a resistor of at least 825 Ohms for R1. The following image shows the pins of a Voltage Sensor Module. Years ago, I bought my first Arduino with one goal: show text on an LCD as soon as The following image shows the schematic of the Voltage Sensor Module with an input voltage limit of 25V. Very interesting & neat project. The Arduino Uno I have laying here actually regulates an external 12 VDC to 4.80 VDC so my Vref is now 4.80 VDC and not 5.0 VDC, consider that in your code. Please try again later. I also intend to eventually use a barrel jack connector so you can use a 12v wall wart to power the circuit in addition to using the battery. How gamebreaking is this magic item that can reduce casting times? This allows you to use the analogue input of a microcontroller to monitor voltages much higher than it capable of sensing. For instance, do you need to monitor two batteries? Test the circuit on a breadboard before you connect the device to your Arduino, because anything more than 5V will fry it. Make sure the batteries are fully charged to read the maximum levels. To poll the second sensor every second for one minute, enter "d". If we tried to run the battery directly to the Arduinos analog pin we would break it immediately. Connect and share knowledge within a single location that is structured and easy to search. Warning:If you are using the same Voltage Sensor Module, then make sure that its input voltage (voltage to be measured) is restricted to 25V. TQ so much. But can you explain it to me more detail sir. This depends on the Vref being 5.0 volts. There was an error retrieving your Wish Lists. As you can see on one side we have a block terminal, this is where we connect the voltage and ground wires coming from a battery. This is the complete circuit diagram of the 12v Battery Efficiency monitoring system.
Making statements based on opinion; back them up with references or personal experience. // for example to set January 27 2017 at 12:56 you would call: // rtc.adjust(DateTime(2019, 7, 19, 14, 46, 0)); Click to share on Twitter (Opens in new window), Click to share on Facebook (Opens in new window), Click to share on WhatsApp (Opens in new window), Click to share on Telegram (Opens in new window), Click to share on Tumblr (Opens in new window), Click to share on LinkedIn (Opens in new window), Click to share on Reddit (Opens in new window), Click to share on Pinterest (Opens in new window), Click to share on Pocket (Opens in new window), Click to share on Skype (Opens in new window). You should soon see "Serial Connected" printed to the screen. Back in post #9. Is it possible to make an MCU hang by messing with its power? For the best understanding watch, this tutorial and then you can resume from here. I would appreciate your support in this way!
This device uses voltage-dividers to reduce voltage to a safe level for the Arduino. Are you implying i have to connect the 12V sensor to arduino port 3 normally, with the optoisolator is connected to the arduino input port?
In this tutorial I'll teach you the way a voltage divider works and how to read a voltage sensor with a range of 0-25V. By "bit count" are you referring to the 0 to 1024 values? Date First Available Can i charge a battery and simultaneously measure the battery level via the application of voltage? If the readings do not match, you can adjust the following section of code to calibrate the system. We dont share your credit card details with third-party sellers, and we dont sell your information to others. Do you intend to have the Arduino do any besides light the LED? Assuming the input pin sees a voltage in the range of 0 to 5 volts, this diode will always be reverse bias, and always an open circuit? You can either use the voltage or bit count Maybe "deep cycle" or "marine battery" comes to mind???
A simple but very useful module which uses a potential divider to reduce any inputvoltageby a factor of 5.
The VCC pin is connected with the Arduinos 5 volts. We now have a working battery monitor, but that's only half the mission. Then load upthe following sketchonto your Arduino. A more compelling benefit will be the long-term data this device generates. In this case, the signal can have a voltage of 12 V and the output of the optoisolation module can be connected to the input of the Arduino, where the input is configured as INPUT_PULLUP. The cables from the center of the voltage-dividers connect to the first two analogue-to-digital pins on the Arduino, A0 and A1. It will print the voltage each time it polls, giving you a list of readings to check stability. I'm shaky on the math if my thoughts & numbers were right, is my 0.53mA calc correct for R1 when input is 21v?
Instead, our system considers things like how recent a review is and if the reviewer bought the item on Amazon. Full content visible, double tap to read brief content. The TXD pin of the module is connected with pin2 of the Arduino and RXD pin of the Bluetooth module is connected with pin3 of the Arduino. Specifications: Test Voltage range: DC3 - 25V Test Current range: DC 0 - 3A Package Included: 1 x MAX471 Voltage Current Sensor Module. As an example, if the first sensor on the Arduino is reading 11.8V and the multimeter reads 12V, try adjusting the value on line 21 to 12.25.
You can either copy and paste the following code into your Arduino IDE or download the full setup folder from here. I will explain this in programming how to make a serial port. Website designed and created by Anth's Computer Cave. As you can see on the left side, the voltage sensor Vcc is connected with the Battery 12v input and the ground of the voltage sensor is connected with ground of battery. On line 21 either increase or decrease the value (12.00) slightly to suit your readings. More sensors can be connected with the Arduino. So just as an example the typical code to measure a voltage would look like this: There will be no current through the Zener under normal conditions.
It has a total of six male headers clearly labeled with. You must tailor the resistors in the device to your maximum-intended monitoring voltage.
Shipping cost, delivery date, and order total (including tax) shown at checkout. These multiple codes did not work for me. The RTC DS3231is a low-cost, highly accurate Real Time Clock, which can maintain hours, minutes, and seconds. Since the Voltage Sensor module is basically a voltage divider circuit, you can calculate input voltage using the formula. For the best understanding read article on the RTC DS3231 given in the related projects section. Or just copy online anywhere. There was a problem adding this item to Cart. I've read power adapters can output more than their rated voltage, some quite high. Does a pulldown resistor use less battery power than a pullup resistor? So in my example if my Vref is 4.80 volts the 5.0 in the above code would be changed to read 4.80. If you need the Source code, send me an email on. I suppose it may come down to you get what you pay for. 468). How can I get an AnyDice conditional to convert a sequence to a boolean?
0-25v Voltage Sensor used in Battery Efficiency Monitoring System: Battery Efficiency Monitoring Circuit Diagram: 12v Battery Efficiency Monitoring Arduino Programming: arduino based battery efficiency monitoring, battery efficiency monitoring using cell phone, battery voltage monitoring using cell phone, how to store sensor values in cell phone app database, how to store the values in cell phone database, Arduino Fingerprint Door Lock, Android biometric, Fingerprint app lock, Introduction to Casing Capping Wiring System, Android app development to control Arduino over Bluetooth using Android Studio, Soil NPK Sensor with Arduino and Android Cell Phone Application for monitoring Soil Nutrient, Arduino esp8266 wifi Home/Office Automation System, IOT based Car Parking System using Arduino and Nodemcu esp8266, How to Create Android App for Arduino Sensor Monitoring over Bluetooth, Arduino Oled i2c Display 128x64 with examples, Wiring, and Libraries issues solved, Electric Motor Tripping Reasons and How to fix them, Star Delta Motors, pH meter Arduino, pH Meter Calibration, DIYMORE pH Sensor Arduino Code, 500W Ebike Brushless Motor Controller wiring explanation, Hoverboard Test, Qualcomm Snapdragon 680 Complete review with benchmarks, Arduino CNC Shield V3.0 and A4988 Hybrid Stepper Motor Driver + Joystick, Arduino DC Motor Speed Control with Encoder, Arduino DC Motor Encoder, LM358 IC Pin Configuration, Working, LM358 Circuit Examples, Arduino Libraries Download and Projects they are used in Project codes, Decoder, 3 to 8 Decoder Block Diagram, Truth Table, and Logic Diagram, Max30100 pulse Oximeter Arduino Code, circuit, and Programming, Control Position and Speed of Stepper Motor using Android Bluetooth App, A4988 Driver, & Arduino, MIT APP inventor Arduino Bluetooth Application Making Explained, LinearLayout in android with example codes, Android Fragments and Fragments Lifecycle, Firebase Android Application Designing using Android Studio, ESP32 DHT11, Complete Circuit Diagram of the battery efficiency monitoring system.