When the sun is directly above, it bounces off the water, leaving specular highlights, hard shadows and conditions that are just not good for photographing. Ive just released a new creative workbook bundle that includes four workbooks aimed at guiding you through the process of curating, composing and creating beautifully unique images. Generally youll need a low ISO like 100 or if your camera allows it even lower, an aperture of f/4 along with an exposure of +0.3 just to ensure the image isnt too dull. Sand, salt water, and wind are a brutal combination and can easily damage your valuable gear. 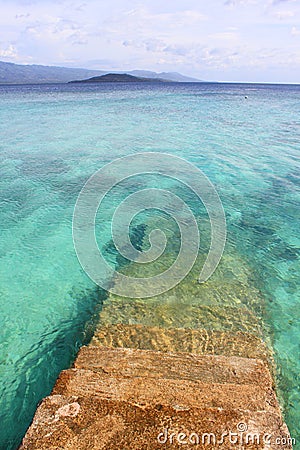
Beach Photography: How to Take Beach Photos, Photography Portfolio: Lisa Michele Burns, Setting the Scene: Long Exposures + Water, Setting the Scene Underwater Photography, A Photographers Guide to Death Valley National Park. If you plan to get serious with your photography, there are a range of underwater housings to suit the most popular cameras. The ocean is my personal favorite landscape subject, but anyone who has taken their camera along to the beach knows that capturing the sea can be trickier that it might appear. Be Aware Of Strong Winds. If youre standing close to the water, pay attention, and try to spot any unusually large waves. Also, dont be afraid to get out of your creative comfort zone. Sunset is by far the most popular choice because youll get the glow of the sun dipping near the horizon along with the warm colours in the sky.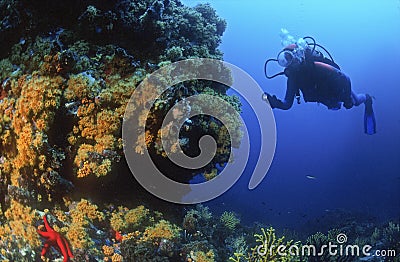 First, use Google or another app to figure out when the sunrise or sunset is, then get into position. We run into the same problem when photographing snow. You can have your camera set up on a tripod and make multiple attempts at capturing the same composition as the waves wash in and out. As the sand lights up so will objects around or above meaning you can highlight trees or people just by adding a little extra exposure to your image. Finally, if youre brave, you could set up a tripod in shallow water and shoot back at the shore. The higher you go, the more depth youll get in your photo. Purchasing an underwater housing for your camera is another way to get in close but thats a whole other level of dedication as youll be in the water too. Would you recommend prime lens or zoom lens to capture great beach images? For starters, you almost always have the horizon to deal with, and its often a straight line across the frame. The ocean is hostile, but all of that action is what accentuates the beauty of your picture. A narrow aperture is a smaller opening (defined by a larger f-number) and restricts the amount of light. For example, small waves along an inlet are very different than the massive waves of Mauis north coast or the water crashing along the shore at Big Sur. A wet camera is a broken camera, so the first rule is not to place it or drop it near the water. And while most people think of ocean photography in terms of east and west, there are locations, most commonly found on islands, that give you a fantastic view of the water while facing to the north or south. Wet rocks equal a slippery surface. Plus, your overall photography skills will elevate considerably. Thank you for sharing. Seawater is generally calmer than ocean water; therefore, it requires a distinct photography technique. The right lighting and clouds can tremendously enhance the quality of your images. Something went wrong. And for non-commercial beach areas, rocky coasts, or more secluded areas, its even easier.
Its all about reading the scene, knowing how to find the best light and composing a creative image to make your beach photo stand out from the millions of others taken this summer. Photographing at long shutter speeds allows you to get some amazing motion on the water, turning receding water into streaks or rendering waves as a hazy mist over the oceans surface. Feel free to share your own best ocean photography tips and your favorite seascape photography locations in the comments! Finding a nice cliff to rest on will help you capture an assortment of different colors and textures. Typically I keep mine at around +0.7 when I have a subject in the frame and am always sure to point the subject toward the sun enabling maximum light. For photography enthusiasts, an all-purpose zoom lens such as a kit 24-70mm is best. I hope its useful for your own travels and would love to hear in the comments about your trips and experiences around the world. Long exposure requires the sensor shutter to remain open longer than in a regular shot. If youre shooting from on top of a cliff, make sure you have a sturdy tripod to protect your camera. Look Out For Wet Rocks.
While its important to try to get your exposure as correct as possible in camera and minimize the recovery youll need later, photographing in RAW can give you the extra dynamic range you need to get a properly exposed final image. If there are unique elements such as an outcropping of rock in the frame, align that with one of the two vertical lines as opposed to placing it dead centre. Planning ahead can go a long way towards protecting your camera. If you have some land, rocks or an island to focus on this will also work well to compose the scene by keeping the ocean horizon to the left or right of the image. Plus, your composition will benefit from shots where the retreating waves stream away from the camera. When capturing an incoming tide, its not always clear how high the wave will come in. Are some of them shot at Hanalei Bay? Some of the best times to photograph at the beach are when there are big fluffy white clouds or giant storms approaching. Controlling the aperture and also applying ND filters manages this. Or, you can slow the shutter speed to demonstrate the inward or outward flow of the tide or a wave. If you look around, youll often find rocky outcroppings, jetties, or even the angle of the land itself that can allow you to capture the side of a wave, especially with a longer lens. Unless you are shooting up close to the foreground (shooting very low against the sand or rocks for example) which would dictates a the need for a smaller aperture (higher f/stop number) I have found that the shutter speed has a much larger impact on the overall image than the aperture and so I prioritize that. Also, I usually clean the sand off my tripod by putting it in the shower for a minute or two. Neutral Density (ND) filters come in a range of sizes and styles they match the filter thread and include fixed ND and variable ND. This genre of photography is fascinating to view and is an essential skill in the catalogue of genres just waiting for you to master. The sunrise or sunset acts as a beautiful backdrop during these golden hours. Heres our guide to the, Bring a lightweight travel tripod with collapsable legs (, Another important and popular lighting technique is to include a sunburst or sun flare in your shot. Thanks for subscribing! Another compositional consideration is to ditch to the landscape method where we frame wide shots with expanses of land in the frame. Pay Attention To The Water. With the right lighting, you can capture a fantastic shot. You never know if the animal is poisonous or aggressive. Typically a wide-angle lens is most suitable for capturing images. Also, as a result of the sun reflecting off of the water and the sand, the ocean tends to be very brightly lit throughout the day. The best time to achieve this photographic phenomenon is during low tide. Photography pros will benefit from a longer zoom with a wider aperture. Like with mountain photography, people can be a good point of interest and add a little bit of story. Given ocean photography involves capturing the motion of water; you need to know the times of the tides. I enjoyed reading the tips you gave because they are concise and clear. I highly agree on some tips you gave such as timing and composition. With the rule of thirds, the image has a more exciting flow that leads the eye around the scene to points of interest where the horizontal and vertical lines intersect. Carry a Flashlight. However, capturing mind-boggling ocean pictures is easier said than done. Photographing with your back to the sun (or with the sun to the side if you are fortunate enough to be on a north or south facing beach) can make for easier exposures and softer light. No matter which direction you are facing, there are good images to be had, as long as you know how to mange the light that is in front of your lens. Also, keep an eye on the behaviour of waves as theyre unpredictable with the size and intensity changing in an instant be aware of how close youre to the crashing waves. The same is true of shooting just before sunrise or just after sunset. The ocean is immense, and as such, most people immediately gravitate towards photographing it with a wide angle lens. Long exposure produces a clear flat horizon, where a medium exposure will make the water come to life. The zoom end allows you to gain reach this is handy if your location requires you to shoot from a distance. To add more movement to your photos, try positioning yourself in front of small rocks, and they can produce beautiful breaks in the waves. Please check your entries and try again. With that in mind, you can do a few things to conquer the oceans might. With ocean photography, the trick is capturing that vibe and communicate the same emotion and sensation. Composing a shot where a pool of, For best results, shoot from a low angle to, With this one, youre safe and dry on the shore while capturing a fantastic photo of the rolling sea. As with any other genre of photography, the composition will make or break your set of images. One of the biggest questions to answer is what camera do ocean photographers use?. Knowledge of the tides is critical to capture the right mood in your composition. Capturing the movement of the waves from this angle will generate a fascinating ocean picture. A dark object will accentuate the suns rays, creating the famous sunburst effect. I love to travel and make a regular trip to Japan to photograph and document its dynamic culture. The point of this is to keep your shutter open longer and give enough time for the waves to move through the image. Keeping your composition quite minimal can produce some stunning results when capturing beach photos. Shooting an outgoing tide with long exposures is considered better and easier as youll know the tide line and that it will only drop further. Im going to walk you through the necessary equipment and knowledge for both casual shooters and the photography pros. Also, it might be wise to check the weather before heading out. Then, pack up your gear and get out in the field to try some of the above techniques first-hand. Most of the time, the first decision you have to make when composing your ocean scene is where to place the horizon. While water is often photographed at slow shutter speeds for seascape photography, its also worth experimenting with faster shutter speeds as well. Today we are going to look at 15 tips for photographing the ocean so that you can come home from your next beach adventure with amazing photographs. If you find the entire photo is blurry then its simply a matter of bring down the aperture to something more manageable like f/10 or increasing your ISO to around 200 or 400 depending on the time of day. Dont stand close to the edge if you feel the wind is powerful enough to push you around. Get creative, and try to think of your image in terms of foreground, middle ground, and background. However, theres no reason to stop there as you experiment with longer shutter speeds try 15 or 30 seconds and see what the outcomes are. The leading authority in photography and camera gear. When framing your shot, you should put your horizon on either of the horizontal lines as opposed to placing it in the middle of the frame. The easiest way to decide where to put the horizon is to consider what your image is about. When photographing the waves themselves, consider photographing from the side and using a faster shutter speed to capture the curl of the water as it crests. Even a dose of sand will ruin your afternoon on the coast. Aperture is the setting that controls how wide the opening within the lens is. But if you are going for the classic orange-pink sunset or sunrise sky, you can try shifting your frame to not actually include the sun. You can either use the horizon or a physical object, like a cliff, to partially block the sun. Waves crashing along a rocky shore can be photographed with a fast shutter speed to freeze the action and capture the splash. Great article. Before you step onto a beach, please consider some essential safety tips. Once you return from your ocean photography outing, thoroughly clean your kit as sand is abrasive, and seawater is corrosive to camera gear. Gorgeous photos and amazing tips! With a telephoto zoom, youll get much closer to the action than with a wide lens. With the sun low against the horizon or just peeking out from behind an outcropping of rock, the camera will pick up the sunlight bursting out in lines or, Using these reflective surfaces in ocean photography is a great way to catch a unique shot , Get yourself into the right position and at the best angle to make the most of the reflection. If you choose to stand your ground, make sure to firmly place your tripod in the sand to prevent your camera from taking an unwanted dive. With the sun low against the horizon or just peeking out from behind an outcropping of rock, the camera will pick up the sunlight bursting out in lines or rays. To create movement in the water youll need to drop your ISO down really low, increase your aperture to f/22 or the highest your camera will allow and then usually have your exposure set at +0.3 to ensure the waves are lit up a little bit but not too much that youll lose detail. I think it will defeat the point of a beach when we visit it during a bad weather, so timing and composition is very important to consider. When it comes to photographing the ocean, few camera settings will have a larger impact on your image than your choice of shutter speed. In ocean shoots, you need to work with long exposures, and the enemy of this work is camera shake. Create some fun by having a friend jumping a short distance away and youll find it reflects beautifully in the sand. But most ocean scenes, especially those with white sand and bright blue water, are quite a bit brighter than that middle gray, so your camera is likely going to underexpose your scene. In truth, you can work with the gear you have, or you can step it up with additional pieces of photography kit. Making a scene known around the world look different can be quite a challenge. When photographing ocean pictures, you want a slow shutter speed it all depends on the look youre going for and also the amount of motion evident. I was photographing along the coast of Big Sur one morning, and after spending about 45 minutes in the same (dry!) However, the human element can bring more life and scale to your pictures. This is particularly useful if youre photographing the beach at sunrise or dusk when the colours in the sky and water are enhanced by changing your White Balance. Grab yourself an underwater housing for your camera or even a waterproof case for your iPhone! Hi Sismita, thanks for your comment! A Neutral Density (ND) filter is essentially just a darkening filter; it cuts down on the amount of light entering your camera, which allows you to use a longer shutter speed while still getting a correct exposure. This is also one of the few times that photographing the ocean mid-day still works. In the meantime though beaches are a great places to test out your reflection photography because when the water has just trickled over the sand it leaves a little shine which you can use as your mirror. Bring a lightweight travel tripod with collapsable legs (like these models) youll thank me when you have to grab your kit and run for the shore due to a big wave. I always recommend having your camera on a quality strap so that it sits around your neck and hangs at your chest, or invest in a waterproof camera case. The precise look of your image depends not just on your shutter speed, but also the amount of water moving along the shore. Use weather sealed gear whenever you are able to, or use a rain cover to protect against mist and water. As with other forms of landscape photography, a strong foreground can do wonders for your seascape images, drawing the viewer into the scene and giving your image more interest. Underwater photography adds a refreshing take on beach photos so take a read of my guide to Underwater photography for Beginners or a more recent Setting the Scene Underwater Photography to see if it could work for your photos. Oceanscapes naturally create sunburst effects. Ill make sure to utilize them once it finally warms up a bit to go to the beach! So, to successfully capture the changing patterns, youll need to adjust your shutter speed accordingly. It exposes the sensor long enough to capture the motion of the waves. Then, depending on the shoreline, you may not have much to use as a foreground, and you are left trying to fit a powerful, dynamic scene that literally stretches as far as you can see, into a single frame. As with the tides, knowing how the waves behave can help you to master this genre of photography. A. But these are not the only options, and its also possible to take good seascape photos where the horizon is near the very top or bottom of the frame or somewhere between the center and thirds marks if it works best for the image at hand. One of the simplest ways to add depth to your composition is to position yourself so that you are shooting along the coastline instead of straight toward the ocean. Because you will never capture the entirety of the ocean in one frame, instead of trying to capture as much as possible, consider seeing just how much you can crop and still tell your story. ), and cameras dont like getting wet, so you need to be conscious of its safety. Long exposure photography chews through batteries and memory card space always pack your spares and have them handy. But photographing the ocean is immensely satisfying, and once you know how to handle the extreme conditions (both physical conditions and lighting conditions), and you start looking at how to build a stronger composition, you will be sure to come home with some great ocean images. If the dynamic range is wider than your camera can handle, you wont be able to capture adequate details in both the highlights and the shadows of the image. Before you even get started taking seascape pictures, its essential to think about how you are going to protect your camera. But dont ignore the possibility of using faster exposures, either. Landscape, seascape and ocean photography all benefit from them enthusiasts should not feel pressured to rush out and buy filters as you can get by without them. Depending on the shutter speed, you can turn a choppy sea into a flat pane of glass with whispy smoke dancing upon it. You want a camera with manual control for the core settings such as shutter speed and aperture allowing you to play and experiment with various effects. I always recommend having your camera on a quality strap so that it sits around your neck and hangs at your chest, or invest in a, Many cameras have weather sealing and waterproofing even weather-resistant cameras wont cope with salt water as its corrosive. With a slow shutter speed, youll capture that trail as it slowly appears and disappears before the next wave comes in. Always prepare for strong winds, especially when on top of cliffs. Read more Setting the Scene: Long Exposures + Water. Remember the longer you have the shutter open, the more light hits the image sensor and increase the exposure. Controlling the shutter speed allows you to match your exposure time with the movement of the ocean. Have fun testing them out at the beach . With warmer weather on the horizon (for those of us in the Northern Hemisphere at least), its a great time to start thinking about how to photograph the ocean. The sun is so bright that including it in your frame is a surefire way to run into an issues with dynamic range. I usually preach that the lens you have will work if youre prepared to make it work. The water is an exciting but wild environment. If youre looking to add some warmth to your beach photo switch your White Balance to cloudy mode which will create a beautiful warm tone to your image. If you do, you often will end up with much stronger compositions. Many cameras have weather sealing and waterproofing even weather-resistant cameras wont cope with salt water as its corrosive. The last thing you want while taking beautiful pictures is to slip on a rock and bust your head open. Bringing the right gear is vital for any landscape photography project, and the ocean is no exception. In most places, sandy beaches or rocky coasts arent known for providing any sort of shelter from the harsh overhead sun. Dramatic shots with dark grumpy clouds look incredible against the water which is usually glowing in contrast to the sky. You can wave goodbye to mediocre prints!:-). Most people dont know it, but the sand can produce beautiful reflections. A wide aperture is a larger opening (represented by a small f-number ) and allows more light. An ND filter limits the light while still keeping the shutter open for a long time. Another way of dealing with the large dynamic range of sunset/sunrise images is to expose so that the sky and water are properly exposed and allow your foreground and other elements to simply go dark, creating silhouettes. Shooting top-down from a safe boardwalk or shooting back into a cove allows you to photography the water hitting the shore. After a day of photographing at the beach, it is essential to remove all the sand from your gear. Read more A Quick Guide to Minimalist Photography. In this guide to ocean photography, we take a look at the significant difference between it and regular. With slow shutter shots its essential to stay really still so either take a tripod, learn to hold your breath (this is my technique) or balance your camera on the sand for a unique viewpoint. Above, we talk about the best gear to bring when taking pictures of the sea. I recommend starting with 1/4 to 1/1 of a second shutter speed. The ocean possesses a magical, compelling and mesmerising quality. The ocean can be really interesting when photographed at slow shutter speeds, creating a blurred effect in the water. Capturing this movement delivers incredible photos, especially if the water gushes around or over a large rock. So rather than a crisp image of the edge of a wave, the ocean will be smooth with whispy elements floating throughout. For portrait photography mid-afternoon is a great time when youve still got the blue colours in the sky and ocean but the light isnt as harsh as earlier in the day meaning your subjects wont blink or squint as much. If you notice a rock is wet, but you need to cross it, make sure to hold onto something sturdy to prevent you from falling. While most people go to the beach hoping for bright, sunny, cloudless skies, the occasional rain shower or storm can make for great lighting conditions for photographs. The following tips should make things a bit easier. This works best with simple scenes and shapes that are easily recognizable like sailboats, palm trees, and even people. Good eye! To ensure you get the perfect shot, make sure to pack the following: Here are nine easy ocean photography techniques to help you take mesmerizing pictures: One of the most critical aspects of ocean photography is knowing the right time to go.
All you really need is a tripod, filters, lens cloths, and the appropriate clothes.
Foliage, sand dunes, and palm trees are options as well.
Check the weather and also the conditions on the sea and ensure others know where youre heading and when youll be returning. Camera lens filters allow you to control the amount of light passing through to the image sensor. The idea is you dont want full sunlight; you want it to be only partially visible. As you may be aware, lighting can make or break your shots. Also, dont forget to adjust your ISO and aperture to get that perfect shot. When doing any photography near the sea, youre bound to get sand and water on your gear. By checking this box I consent to the use of my information, as detailed in the Privacy Policy. Im the founder and photographer behind The Wandering Lens. RAW captures much more information than a JPEG file and will give you the ability to recover shadow or highlight detail that would be lost in a JPEG image.

Beach Photography: How to Take Beach Photos, Photography Portfolio: Lisa Michele Burns, Setting the Scene: Long Exposures + Water, Setting the Scene Underwater Photography, A Photographers Guide to Death Valley National Park. If you plan to get serious with your photography, there are a range of underwater housings to suit the most popular cameras. The ocean is my personal favorite landscape subject, but anyone who has taken their camera along to the beach knows that capturing the sea can be trickier that it might appear. Be Aware Of Strong Winds. If youre standing close to the water, pay attention, and try to spot any unusually large waves. Also, dont be afraid to get out of your creative comfort zone. Sunset is by far the most popular choice because youll get the glow of the sun dipping near the horizon along with the warm colours in the sky.
First, use Google or another app to figure out when the sunrise or sunset is, then get into position. We run into the same problem when photographing snow. You can have your camera set up on a tripod and make multiple attempts at capturing the same composition as the waves wash in and out. As the sand lights up so will objects around or above meaning you can highlight trees or people just by adding a little extra exposure to your image. Finally, if youre brave, you could set up a tripod in shallow water and shoot back at the shore. The higher you go, the more depth youll get in your photo. Purchasing an underwater housing for your camera is another way to get in close but thats a whole other level of dedication as youll be in the water too. Would you recommend prime lens or zoom lens to capture great beach images? For starters, you almost always have the horizon to deal with, and its often a straight line across the frame. The ocean is hostile, but all of that action is what accentuates the beauty of your picture. A narrow aperture is a smaller opening (defined by a larger f-number) and restricts the amount of light. For example, small waves along an inlet are very different than the massive waves of Mauis north coast or the water crashing along the shore at Big Sur. A wet camera is a broken camera, so the first rule is not to place it or drop it near the water. And while most people think of ocean photography in terms of east and west, there are locations, most commonly found on islands, that give you a fantastic view of the water while facing to the north or south. Wet rocks equal a slippery surface. Plus, your overall photography skills will elevate considerably. Thank you for sharing. Seawater is generally calmer than ocean water; therefore, it requires a distinct photography technique. The right lighting and clouds can tremendously enhance the quality of your images. Something went wrong. And for non-commercial beach areas, rocky coasts, or more secluded areas, its even easier. Its all about reading the scene, knowing how to find the best light and composing a creative image to make your beach photo stand out from the millions of others taken this summer. Photographing at long shutter speeds allows you to get some amazing motion on the water, turning receding water into streaks or rendering waves as a hazy mist over the oceans surface. Feel free to share your own best ocean photography tips and your favorite seascape photography locations in the comments! Finding a nice cliff to rest on will help you capture an assortment of different colors and textures. Typically I keep mine at around +0.7 when I have a subject in the frame and am always sure to point the subject toward the sun enabling maximum light. For photography enthusiasts, an all-purpose zoom lens such as a kit 24-70mm is best. I hope its useful for your own travels and would love to hear in the comments about your trips and experiences around the world. Long exposure requires the sensor shutter to remain open longer than in a regular shot. If youre shooting from on top of a cliff, make sure you have a sturdy tripod to protect your camera. Look Out For Wet Rocks.
While its important to try to get your exposure as correct as possible in camera and minimize the recovery youll need later, photographing in RAW can give you the extra dynamic range you need to get a properly exposed final image. If there are unique elements such as an outcropping of rock in the frame, align that with one of the two vertical lines as opposed to placing it dead centre. Planning ahead can go a long way towards protecting your camera. If you have some land, rocks or an island to focus on this will also work well to compose the scene by keeping the ocean horizon to the left or right of the image. Plus, your composition will benefit from shots where the retreating waves stream away from the camera. When capturing an incoming tide, its not always clear how high the wave will come in. Are some of them shot at Hanalei Bay? Some of the best times to photograph at the beach are when there are big fluffy white clouds or giant storms approaching. Controlling the aperture and also applying ND filters manages this. Or, you can slow the shutter speed to demonstrate the inward or outward flow of the tide or a wave. If you look around, youll often find rocky outcroppings, jetties, or even the angle of the land itself that can allow you to capture the side of a wave, especially with a longer lens. Unless you are shooting up close to the foreground (shooting very low against the sand or rocks for example) which would dictates a the need for a smaller aperture (higher f/stop number) I have found that the shutter speed has a much larger impact on the overall image than the aperture and so I prioritize that. Also, I usually clean the sand off my tripod by putting it in the shower for a minute or two. Neutral Density (ND) filters come in a range of sizes and styles they match the filter thread and include fixed ND and variable ND. This genre of photography is fascinating to view and is an essential skill in the catalogue of genres just waiting for you to master. The sunrise or sunset acts as a beautiful backdrop during these golden hours. Heres our guide to the, Bring a lightweight travel tripod with collapsable legs (, Another important and popular lighting technique is to include a sunburst or sun flare in your shot. Thanks for subscribing! Another compositional consideration is to ditch to the landscape method where we frame wide shots with expanses of land in the frame. Pay Attention To The Water. With the right lighting, you can capture a fantastic shot. You never know if the animal is poisonous or aggressive. Typically a wide-angle lens is most suitable for capturing images. Also, as a result of the sun reflecting off of the water and the sand, the ocean tends to be very brightly lit throughout the day. The best time to achieve this photographic phenomenon is during low tide. Photography pros will benefit from a longer zoom with a wider aperture. Like with mountain photography, people can be a good point of interest and add a little bit of story. Given ocean photography involves capturing the motion of water; you need to know the times of the tides. I enjoyed reading the tips you gave because they are concise and clear. I highly agree on some tips you gave such as timing and composition. With the rule of thirds, the image has a more exciting flow that leads the eye around the scene to points of interest where the horizontal and vertical lines intersect. Carry a Flashlight. However, capturing mind-boggling ocean pictures is easier said than done. Photographing with your back to the sun (or with the sun to the side if you are fortunate enough to be on a north or south facing beach) can make for easier exposures and softer light. No matter which direction you are facing, there are good images to be had, as long as you know how to mange the light that is in front of your lens. Also, keep an eye on the behaviour of waves as theyre unpredictable with the size and intensity changing in an instant be aware of how close youre to the crashing waves. The same is true of shooting just before sunrise or just after sunset. The ocean is immense, and as such, most people immediately gravitate towards photographing it with a wide angle lens. Long exposure produces a clear flat horizon, where a medium exposure will make the water come to life. The zoom end allows you to gain reach this is handy if your location requires you to shoot from a distance. To add more movement to your photos, try positioning yourself in front of small rocks, and they can produce beautiful breaks in the waves. Please check your entries and try again. With that in mind, you can do a few things to conquer the oceans might. With ocean photography, the trick is capturing that vibe and communicate the same emotion and sensation. Composing a shot where a pool of, For best results, shoot from a low angle to, With this one, youre safe and dry on the shore while capturing a fantastic photo of the rolling sea. As with any other genre of photography, the composition will make or break your set of images. One of the biggest questions to answer is what camera do ocean photographers use?. Knowledge of the tides is critical to capture the right mood in your composition. Capturing the movement of the waves from this angle will generate a fascinating ocean picture. A dark object will accentuate the suns rays, creating the famous sunburst effect. I love to travel and make a regular trip to Japan to photograph and document its dynamic culture. The point of this is to keep your shutter open longer and give enough time for the waves to move through the image. Keeping your composition quite minimal can produce some stunning results when capturing beach photos. Shooting an outgoing tide with long exposures is considered better and easier as youll know the tide line and that it will only drop further. Im going to walk you through the necessary equipment and knowledge for both casual shooters and the photography pros. Also, it might be wise to check the weather before heading out. Then, pack up your gear and get out in the field to try some of the above techniques first-hand. Most of the time, the first decision you have to make when composing your ocean scene is where to place the horizon. While water is often photographed at slow shutter speeds for seascape photography, its also worth experimenting with faster shutter speeds as well. Today we are going to look at 15 tips for photographing the ocean so that you can come home from your next beach adventure with amazing photographs. If you find the entire photo is blurry then its simply a matter of bring down the aperture to something more manageable like f/10 or increasing your ISO to around 200 or 400 depending on the time of day. Dont stand close to the edge if you feel the wind is powerful enough to push you around. Get creative, and try to think of your image in terms of foreground, middle ground, and background. However, theres no reason to stop there as you experiment with longer shutter speeds try 15 or 30 seconds and see what the outcomes are. The leading authority in photography and camera gear. When framing your shot, you should put your horizon on either of the horizontal lines as opposed to placing it in the middle of the frame. The easiest way to decide where to put the horizon is to consider what your image is about. When photographing the waves themselves, consider photographing from the side and using a faster shutter speed to capture the curl of the water as it crests. Even a dose of sand will ruin your afternoon on the coast. Aperture is the setting that controls how wide the opening within the lens is. But if you are going for the classic orange-pink sunset or sunrise sky, you can try shifting your frame to not actually include the sun. You can either use the horizon or a physical object, like a cliff, to partially block the sun. Waves crashing along a rocky shore can be photographed with a fast shutter speed to freeze the action and capture the splash. Great article. Before you step onto a beach, please consider some essential safety tips. Once you return from your ocean photography outing, thoroughly clean your kit as sand is abrasive, and seawater is corrosive to camera gear. Gorgeous photos and amazing tips! With a telephoto zoom, youll get much closer to the action than with a wide lens. With the sun low against the horizon or just peeking out from behind an outcropping of rock, the camera will pick up the sunlight bursting out in lines or, Using these reflective surfaces in ocean photography is a great way to catch a unique shot , Get yourself into the right position and at the best angle to make the most of the reflection. If you choose to stand your ground, make sure to firmly place your tripod in the sand to prevent your camera from taking an unwanted dive. With the sun low against the horizon or just peeking out from behind an outcropping of rock, the camera will pick up the sunlight bursting out in lines or rays. To create movement in the water youll need to drop your ISO down really low, increase your aperture to f/22 or the highest your camera will allow and then usually have your exposure set at +0.3 to ensure the waves are lit up a little bit but not too much that youll lose detail. I think it will defeat the point of a beach when we visit it during a bad weather, so timing and composition is very important to consider. When it comes to photographing the ocean, few camera settings will have a larger impact on your image than your choice of shutter speed. In ocean shoots, you need to work with long exposures, and the enemy of this work is camera shake. Create some fun by having a friend jumping a short distance away and youll find it reflects beautifully in the sand. But most ocean scenes, especially those with white sand and bright blue water, are quite a bit brighter than that middle gray, so your camera is likely going to underexpose your scene. In truth, you can work with the gear you have, or you can step it up with additional pieces of photography kit. Making a scene known around the world look different can be quite a challenge. When photographing ocean pictures, you want a slow shutter speed it all depends on the look youre going for and also the amount of motion evident. I was photographing along the coast of Big Sur one morning, and after spending about 45 minutes in the same (dry!) However, the human element can bring more life and scale to your pictures. This is particularly useful if youre photographing the beach at sunrise or dusk when the colours in the sky and water are enhanced by changing your White Balance. Grab yourself an underwater housing for your camera or even a waterproof case for your iPhone! Hi Sismita, thanks for your comment! A Neutral Density (ND) filter is essentially just a darkening filter; it cuts down on the amount of light entering your camera, which allows you to use a longer shutter speed while still getting a correct exposure. This is also one of the few times that photographing the ocean mid-day still works. In the meantime though beaches are a great places to test out your reflection photography because when the water has just trickled over the sand it leaves a little shine which you can use as your mirror. Bring a lightweight travel tripod with collapsable legs (like these models) youll thank me when you have to grab your kit and run for the shore due to a big wave. I always recommend having your camera on a quality strap so that it sits around your neck and hangs at your chest, or invest in a waterproof camera case. The precise look of your image depends not just on your shutter speed, but also the amount of water moving along the shore. Use weather sealed gear whenever you are able to, or use a rain cover to protect against mist and water. As with other forms of landscape photography, a strong foreground can do wonders for your seascape images, drawing the viewer into the scene and giving your image more interest. Underwater photography adds a refreshing take on beach photos so take a read of my guide to Underwater photography for Beginners or a more recent Setting the Scene Underwater Photography to see if it could work for your photos. Oceanscapes naturally create sunburst effects. Ill make sure to utilize them once it finally warms up a bit to go to the beach! So, to successfully capture the changing patterns, youll need to adjust your shutter speed accordingly. It exposes the sensor long enough to capture the motion of the waves. Then, depending on the shoreline, you may not have much to use as a foreground, and you are left trying to fit a powerful, dynamic scene that literally stretches as far as you can see, into a single frame. As with the tides, knowing how the waves behave can help you to master this genre of photography. A. But these are not the only options, and its also possible to take good seascape photos where the horizon is near the very top or bottom of the frame or somewhere between the center and thirds marks if it works best for the image at hand. One of the simplest ways to add depth to your composition is to position yourself so that you are shooting along the coastline instead of straight toward the ocean. Because you will never capture the entirety of the ocean in one frame, instead of trying to capture as much as possible, consider seeing just how much you can crop and still tell your story. ), and cameras dont like getting wet, so you need to be conscious of its safety. Long exposure photography chews through batteries and memory card space always pack your spares and have them handy. But photographing the ocean is immensely satisfying, and once you know how to handle the extreme conditions (both physical conditions and lighting conditions), and you start looking at how to build a stronger composition, you will be sure to come home with some great ocean images. If the dynamic range is wider than your camera can handle, you wont be able to capture adequate details in both the highlights and the shadows of the image. Before you even get started taking seascape pictures, its essential to think about how you are going to protect your camera. But dont ignore the possibility of using faster exposures, either. Landscape, seascape and ocean photography all benefit from them enthusiasts should not feel pressured to rush out and buy filters as you can get by without them. Depending on the shutter speed, you can turn a choppy sea into a flat pane of glass with whispy smoke dancing upon it. You want a camera with manual control for the core settings such as shutter speed and aperture allowing you to play and experiment with various effects. I always recommend having your camera on a quality strap so that it sits around your neck and hangs at your chest, or invest in a, Many cameras have weather sealing and waterproofing even weather-resistant cameras wont cope with salt water as its corrosive. With a slow shutter speed, youll capture that trail as it slowly appears and disappears before the next wave comes in. Always prepare for strong winds, especially when on top of cliffs. Read more Setting the Scene: Long Exposures + Water. Remember the longer you have the shutter open, the more light hits the image sensor and increase the exposure. Controlling the shutter speed allows you to match your exposure time with the movement of the ocean. Have fun testing them out at the beach . With warmer weather on the horizon (for those of us in the Northern Hemisphere at least), its a great time to start thinking about how to photograph the ocean. The sun is so bright that including it in your frame is a surefire way to run into an issues with dynamic range. I usually preach that the lens you have will work if youre prepared to make it work. The water is an exciting but wild environment. If youre looking to add some warmth to your beach photo switch your White Balance to cloudy mode which will create a beautiful warm tone to your image. If you do, you often will end up with much stronger compositions. Many cameras have weather sealing and waterproofing even weather-resistant cameras wont cope with salt water as its corrosive. The last thing you want while taking beautiful pictures is to slip on a rock and bust your head open. Bringing the right gear is vital for any landscape photography project, and the ocean is no exception. In most places, sandy beaches or rocky coasts arent known for providing any sort of shelter from the harsh overhead sun. Dramatic shots with dark grumpy clouds look incredible against the water which is usually glowing in contrast to the sky. You can wave goodbye to mediocre prints!:-). Most people dont know it, but the sand can produce beautiful reflections. A wide aperture is a larger opening (represented by a small f-number ) and allows more light. An ND filter limits the light while still keeping the shutter open for a long time. Another way of dealing with the large dynamic range of sunset/sunrise images is to expose so that the sky and water are properly exposed and allow your foreground and other elements to simply go dark, creating silhouettes. Shooting top-down from a safe boardwalk or shooting back into a cove allows you to photography the water hitting the shore. After a day of photographing at the beach, it is essential to remove all the sand from your gear. Read more A Quick Guide to Minimalist Photography. In this guide to ocean photography, we take a look at the significant difference between it and regular. With slow shutter shots its essential to stay really still so either take a tripod, learn to hold your breath (this is my technique) or balance your camera on the sand for a unique viewpoint. Above, we talk about the best gear to bring when taking pictures of the sea. I recommend starting with 1/4 to 1/1 of a second shutter speed. The ocean possesses a magical, compelling and mesmerising quality. The ocean can be really interesting when photographed at slow shutter speeds, creating a blurred effect in the water. Capturing this movement delivers incredible photos, especially if the water gushes around or over a large rock. So rather than a crisp image of the edge of a wave, the ocean will be smooth with whispy elements floating throughout. For portrait photography mid-afternoon is a great time when youve still got the blue colours in the sky and ocean but the light isnt as harsh as earlier in the day meaning your subjects wont blink or squint as much. If you notice a rock is wet, but you need to cross it, make sure to hold onto something sturdy to prevent you from falling. While most people go to the beach hoping for bright, sunny, cloudless skies, the occasional rain shower or storm can make for great lighting conditions for photographs. The following tips should make things a bit easier. This works best with simple scenes and shapes that are easily recognizable like sailboats, palm trees, and even people. Good eye! To ensure you get the perfect shot, make sure to pack the following: Here are nine easy ocean photography techniques to help you take mesmerizing pictures: One of the most critical aspects of ocean photography is knowing the right time to go.
All you really need is a tripod, filters, lens cloths, and the appropriate clothes.
Foliage, sand dunes, and palm trees are options as well.
Check the weather and also the conditions on the sea and ensure others know where youre heading and when youll be returning. Camera lens filters allow you to control the amount of light passing through to the image sensor. The idea is you dont want full sunlight; you want it to be only partially visible. As you may be aware, lighting can make or break your shots. Also, dont forget to adjust your ISO and aperture to get that perfect shot. When doing any photography near the sea, youre bound to get sand and water on your gear. By checking this box I consent to the use of my information, as detailed in the Privacy Policy. Im the founder and photographer behind The Wandering Lens. RAW captures much more information than a JPEG file and will give you the ability to recover shadow or highlight detail that would be lost in a JPEG image.